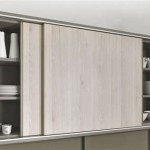
Updating Kitchen Cabinets With Contact Paper
Contact paper provides a simple and cost-effective solution for refreshing the look of your kitchen cabinets without the hassle and expense of replacing them. Whether you're seeking a quick facelift or a complete makeover, here's a comprehensive guide to help you master the art of updating your kitchen cabinets with contact paper.
Preparing Your Cabinets
Before you start applying contact paper, it's essential to prepare your cabinets. Clean them thoroughly with a degreasing solution to remove any dirt and grease that may prevent the paper from adhering properly. Sand any rough edges or imperfections to create a smooth surface. If your cabinets have any pulls or knobs, remove them temporarily.
Choosing the Right Contact Paper
Selecting the right contact paper is crucial for both durability and aesthetics. Consider the following factors:
- Material: Vinyl is the most popular option for kitchen cabinets as it's waterproof and easy to clean.
- Pattern: Choose a pattern that complements your kitchen's style, whether it's a solid color, woodgrain, or decorative motif.
- Adhesiveness: Opt for contact paper with a strong adhesive that will hold up well to heat and moisture.
Applying the Contact Paper
Follow these steps to apply the contact paper smoothly and effectively:
- Measure and cut: Measure the surfaces you want to cover and cut the contact paper accordingly, leaving a few inches of overlap on all sides.
- Peel and apply: Peel a small section of the backing paper and align it with the edge of the cabinet. Smooth it down gently, using a squeegee or credit card to remove any bubbles.
- Trim the excess: Once the paper is applied, use a sharp utility knife to trim the excess around the edges, ensuring a clean and professional finish.
Finishing Touches
After applying the contact paper, reattach any pulls or knobs, and take a step back to admire your updated kitchen cabinets. If you encounter any wrinkles or air bubbles, gently lift the paper and smooth it out before reapplying. Apply heat from a hairdryer or heat gun if necessary to increase the adhesion.
Tips for Success
- Use a sharp knife: A dull knife can tear or damage the contact paper.
- Work in small sections: Applying the paper in smaller sections makes it easier to avoid bubbles and wrinkles.
- Don't stretch the paper: Stretching the paper can cause it to wrinkle and distort.
- Use a squeegee or credit card: Smooth out the paper thoroughly to remove any air bubbles.

How To Update Cabinets Using Contact Paper Al Kitchen Makeover Cover

When Your Landlord Says Paint Is Out Of The Question Try Contact Paper For Cabinets Domino

Re Wrapping Kitchen Cabinets With Contact Paper Er Friendly

Diy Kitchen Cabinet Makeover With Only Contact Paper Al Friendly

Diy Kitchen Cabinet Makeover L And Stick Contact Paper Cabinets

Contact Paper Kitchen Update Part 2 Countertop Roaming Home

Update Your Cabinets With Contact Paper Tips For

Update Contact Paper Kitchen Makeover Apartment Decorating Al Diy

Kitchen Remodel Project Diy Cabinet Update With Wrapping Paper Tatertots And Jello

Re Wrapping Kitchen Cabinets With Contact Paper Er Friendly
Related Posts


