Replacing a Kitchen Sink Cabinet Bottom: A Step-by-Step Guide
Replacing the bottom of a kitchen sink cabinet may seem like a daunting task, but it is a relatively straightforward project that can be completed in a few hours. With the right tools and materials, you can restore your cabinet to its former glory and enjoy a functional and stylish kitchen.
Materials Required:
- New cabinet bottom
- Plywood or MDF
- Wood screws
- Construction adhesive
- Caulk
- Sandpaper
- Safety glasses
- Drill/driver
- Circular saw or jigsaw
- Hammer or nail gun
- Level
Steps:
1. Safety First
Put on your safety glasses and ensure your work area is well-ventilated. Disconnect the water supply to the sink before starting any work.
2. Remove Old Sink and Countertop
Disconnect the plumbing and electrical connections to the sink. Remove the sink and countertop by carefully lifting them off the cabinet. Set them aside.
3. Remove Damaged Bottom
Using a hammer or pry bar, carefully remove the damaged bottom from the cabinet. If the bottom is severely damaged, use a saw to cut it out.
4. Cut New Bottom
Measure and cut a new bottom from plywood or MDF. Make sure it fits snugly within the cabinet frame. Ensure the edges are straight and sanded smooth.
5. Attach New Bottom
Apply a bead of construction adhesive around the edges of the cabinet frame. Align the new bottom and attach it using wood screws. Reinforce the attachment by driving nails or using a nail gun around the edges.
6. Install Countertop and Sink
Place the countertop on the cabinet and secure it to the frame. Reinstall the sink and reconnect the plumbing and electrical connections.
7. Caulk the Edges
Apply a bead of caulk around the edges of the countertop and sink to prevent water damage. Allow the caulk to dry completely.
8. Final Touches
Inspect the replaced bottom and make any necessary adjustments. Check for leaks and ensure the sink is functioning correctly.
Tips:
- Use a level to ensure the new bottom is installed evenly.
- Reinforce the corners of the new bottom with additional screws or nails for added strength.
- If the new bottom is made of plywood, seal it with a waterproof finish to prevent water damage.
- Consider replacing the entire cabinet if the damage is extensive or the cabinet is structurally compromised.

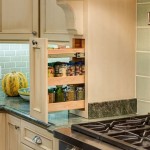
How To Remove Kitchen Sink Base Cabinet

Under Sink Cabinet Repair Our Bright Road

When Repairing The Bottom Of Cabinet Below Kitchen Sink Do I Need To Take Damaged Section Out Or Can Simply Put Plywood On Top It Quora

We Repair Water Damaged Sink Base Cabinet Floor

Under Sink Cabinet Repair Our Bright Road

How To Replace A Kitchen Sink Base Cabinet Vevano

Replace Sink Cabinet Floor

How To Fix Rotted Cabinet Bottom Floor Much Sink Install House Remodeling Decorating Construction Energy Use Kitchen Bathroom Bedroom Building Rooms City Data Forum

How To Replace Rotted Wood Under A Kitchen Sink Diy Guide Dengarden

How To Replace A Rotten Kitchen Cabinet Floor 8 Simple Steps Replacing Cabinets Redo
Related Posts