Replace Kitchen Cabinet Drawer Slides — A Simple Guide
Kitchen cabinet drawer slides, also known as drawer glides, play a crucial role in the smooth opening and closing of drawers. Over time, these slides can become worn out or damaged, causing drawers to stick, bind, or even fall out. Replacing kitchen cabinet drawer slides is a relatively simple task that can be completed in a few steps. Here's a comprehensive guide to help you tackle this project.
1. Gather Necessary Tools and Materials
Before you start, gather the following tools and materials:
- New drawer slides of the correct size and type
- Phillips head screwdriver
- Measuring tape or ruler
- Drill (optional)
- Screws (if not included with the drawer slides)
2. Remove the Old Drawer Slides
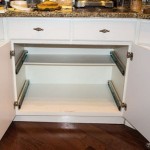
Start by removing the drawer from the cabinet. Most drawers have a release lever or button at the back. Pull the lever or press the button and slide the drawer out. Once the drawer is out, locate the screws that attach the drawer slides to the cabinet and drawer. Remove these screws and carefully detach the old drawer slides.
3. Measure and Install the New Drawer Slides
Measure the length of the drawer opening in the cabinet. Choose new drawer slides that are the same length or slightly longer than the opening. Place the new drawer slides on the sides of the drawer opening, ensuring they are aligned properly. Use screws to secure the slides to the cabinet.
Next, place the drawer back into the opening and insert the drawer slides into the slots on the drawer. Push the drawer in gently until it stops. Check if the drawer opens and closes smoothly. Adjust the slides as needed to ensure smooth operation.
4. Drill Pilot Holes (Optional)
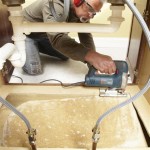
For added strength, you can drill pilot holes before inserting the screws. Place the drawer slides in position and mark the screw holes with a pencil. Remove the slides and drill small pilot holes at the marked locations. This will make it easier to insert the screws and prevent the wood from splitting.
5. Secure the Drawer Slides
Align the drawer slides on the cabinet and drawer, and insert the screws into the pilot holes (or directly into the wood if you did not drill pilot holes). Tighten the screws securely using a Phillips head screwdriver. Double-check the drawer's operation to ensure it opens and closes smoothly without any binding or sticking.
Congratulations! You have successfully replaced your kitchen cabinet drawer slides. Enjoy the smooth operation and convenience of your drawers for years to come.

How To Replace Drawer Slides

How To Install Drawer Slides The Easy Way

Replacing Drawer Slides Extreme How To

How To Install Cabinet Drawers With Ball Bearing Slides Houseful Of Handmade

How To Install Soft Close Drawer Slides Kitchen Cabinet Upgrades

How To Install Cabinet Drawers With Ball Bearing Slides Houseful Of Handmade

How To Install Soft Close Drawer Slides

How To Fit Or Replace A Drawer Slide Runner

My 9 Best Tips For Installing Cabinet Drawers Remodelando La Casa

Learn How To Install Soft Close Drawer Slides Kitchen Storage Appliances Drawers
Related Posts

