Painting Wood Kitchen Cabinets With Chalk Paint: A Comprehensive Guide
Chalk paint has become increasingly popular for refurbishing wood kitchen cabinets due to its versatility, ease of use, and ability to create a unique and stylish finish. However, achieving a successful paint job requires careful preparation and execution. Here is a comprehensive guide to ensure a flawless transformation of your kitchen cabinets using chalk paint:
1. Cabinet Preparation
The key to a successful paint job lies in proper preparation. Start by removing all cabinet doors and hardware. Thoroughly clean the cabinets with a degreasing cleaner to remove any dirt, grease, or grime that may affect the paint's adhesion. Use a sanding sponge to lightly sand the surfaces to provide a rougher texture for better paint grip. Wipe away any dust or debris.
2. Prime the Cabinets
Applying a primer coat is essential for achieving a smooth and even paint finish, especially on wood surfaces. Choose a water-based primer specifically formulated for chalk paint. Apply a thin, even coat to all cabinet surfaces using a brush or roller. Allow the primer to dry completely before proceeding to the next step.
3. Applying Chalk Paint
Stir the chalk paint thoroughly before use. Using a high-quality brush specially designed for chalk paint, apply the first coat in even, thin strokes. Allow the paint to dry partially, but not completely. Lightly sand any imperfections or brush marks with a fine-grit sandpaper. Apply additional coats as needed to achieve desired coverage and opacity.
4. Finishing Touches
Once the chalk paint has completely dried, it is time to enhance its durability and appearance. Seal the paint with a clear wax or polyurethane finish. Use a soft cloth or brush to apply the finish in thin, even coats. Allow each coat to dry before applying the next. The finish will protect the paint from scratches, stains, and wear and tear, ensuring a long-lasting finish.
5. Reassembly and Hardware
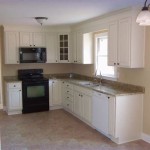
After the final coat of finish has dried, carefully reassemble the cabinet doors and hardware. Ensure a snug fit to prevent any rattling or movement. Step back and admire your beautifully transformed kitchen cabinets in their new chalk paint finish, adding a touch of charm and elegance to your kitchen space.

Painting Kitchen Cabinets With Chalk Paint Simply Today Life

Chalk Painted Kitchen Cabinets 2 Years Later Our Storied Home

Craftaholics Anonymous How To Paint Kitchen Cabinets With Chalk

Chalk Painted Kitchen Cabinets 2 Years Later Our Storied Home

Painting Kitchen Cabinets With Chalk Paint Simply Today Life

Why I Repainted My Chalk Painted Cabinets Sincerely Sara D Home Decor Diy Projects

Chalk Paint Furniture Transform Your Home Decor

Painting Kitchen Cabinets With Chalk Paint The Kelly Homestead

Why I Repainted My Chalk Painted Cabinets Sincerely Sara D Home Decor Diy Projects

Chalk Paint Holland Avenue Home