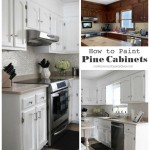
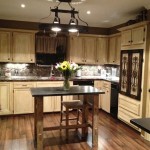
Painted Kitchen Cabinets Before and After: A Transformation Guide
Revitalizing your kitchen with painted cabinets can breathe new life into your home. However, meticulous planning and preparation are crucial for a successful transformation. Let's explore the essential aspects to consider when painting kitchen cabinets, from selecting colors to achieving a flawless finish.
Color Selection
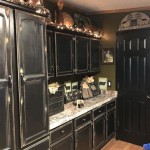
Choosing the right paint color for your kitchen cabinets is paramount. Consider the overall style of your kitchen, lighting conditions, and the desired ambiance. Darker colors, such as navy or black, can create a sophisticated and dramatic atmosphere, while lighter hues, like white or gray, convey a brighter and airier feel. Keep in mind the undertones of different colors to ensure they complement the existing décor.
Surface Preparation
Proper preparation of your cabinet surfaces is essential for a lasting and professional-looking finish. Thoroughly clean the cabinets with a degreaser or TSP solution to remove any dirt, grime, or grease. Sand the surfaces lightly using fine-grit sandpaper to create a smooth and even base for the paint. Fill in any cracks or holes with wood filler and allow it to dry completely.
Priming
Primer is fundamental for creating a strong bond between the paint and the cabinet surface. It seals the wood, prevents stains from seeping through, and provides a uniform canvas for the paint. Apply a coat of high-quality primer specifically designed for kitchen cabinets, ensuring even coverage and following the manufacturer's instructions.
Painting
When choosing paint, opt for a durable and washable finish that can withstand wear and tear in the kitchen environment. Use a brush or roller to apply the paint in thin, even coats. Allow each coat to dry thoroughly before applying the next. For a smooth and professional finish, consider using a foam roller or sprayer for the final coat.
Hardware Update
Updating the cabinet hardware can complement the new paint color and enhance the overall aesthetic. Choose hardware that complements the style of your kitchen and is comfortable to use. Replace old or outdated knobs and handles with new ones that add a touch of personality and functionality. Consider the size, shape, and finish of the hardware to create a cohesive design.
Additional Tips
- Protect the surrounding areas, such as countertops and floors, with drop cloths or painter's tape.
- Open windows or use a fan for ventilation during painting and drying.
- Allow ample time for each step to ensure proper adhesion and finish.
- Test the paint color on an inconspicuous area before painting the entire cabinets.
- Consider hiring a professional painter if you are not confident in your DIY abilities.
By following these essential aspects, you can successfully transform your kitchen cabinets, creating a refreshed and stylish space that enhances the overall ambiance of your home.

15 Diy Kitchen Cabinet Makeovers Before After Photos Of Cabinets

Our Painted Cabinets Five Years Later Nina Hendrick Home

Kitchen Painting Projects Before And After Paper Moon

How To Paint Kitchen Cabinets So They Look Amazing And Last Weekend Diy Projects

Painted Cabinets Nashville Tn Before And After Photos

Update On Our Diy White Painted Kitchen Cabinets 2 Years Later

Should I Paint My Kitchen Cabinets

Painted Cabinets Nashville Tn Before And After Photos

Painted Kitchen Cabinet Ideas And Makeover Reveal The Polka Dot Chair

Painted Kitchen Cabinets One Year Later The Palette Muse
Related Posts

