Essential Aspects of Kitchen Cabinets Crown Molding Installation
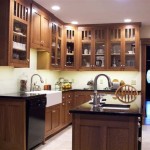
Crown molding is a versatile and elegant addition to any kitchen, adding a touch of sophistication and grandeur. Installing it over kitchen cabinets can create a visually stunning and cohesive look, drawing the eye upward and adding an element of architectural interest. However, achieving a seamless and professional-looking installation requires careful planning, precise measurements, and meticulous execution. Here are the essential aspects to consider:
1. Material Selection:
Crown molding is typically made from wood, MDF (medium-density fiberboard), or PVC (polyvinyl chloride). Wood offers classic beauty and durability, while MDF is a cost-effective option that can be painted or stained to match the cabinets. PVC is moisture-resistant, making it suitable for humid environments. Choose a material that aligns with your style preferences, budget, and functional requirements.
2. Measurement Accuracy:
Precise measurements are crucial to ensure a proper fit. Measure the length of the cabinet tops, taking into account any overhang or setbacks. Determine the height of the molding and calculate the necessary angle cuts for both the inside and outside corners.
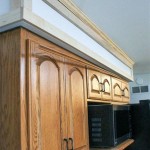
3. Angled Cuts:
The corners where the molding meets require angled cuts to create a seamless transition. Use a miter saw or chop saw to cut the molding at a 45-degree angle for inside corners and a 90-degree angle for outside corners. Ensure the cuts are clean and precise to avoid gaps or uneven edges.
4. Attachment Methods:
There are several methods for attaching crown molding to cabinets, including nails, glue, and a combination of both. Nails provide secure hold, while glue offers additional stability and prevents squeaks. Use a brad nailer for a discreet and clean finish.
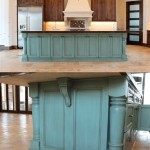
5. Filler and Caulking:
Small gaps or imperfections may occur during installation. Fill these with a paintable caulk or wood filler. Sand the filled areas smooth to ensure a uniform surface. Caulking around the edges where the molding meets the wall or ceiling creates a watertight seal and enhances the finished look.
6. Painting or Staining:
If the molding is unfinished, you may want to paint or stain it to match the cabinets or add a contrasting color. Use a high-quality primer to ensure proper adhesion and prevent the finish from chipping or peeling.
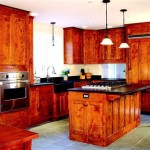
7. Lighting Integration:
Consider incorporating under-cabinet lighting behind the crown molding to create ambient illumination and highlight the architectural details. This adds both functionality and visual appeal to the space.
Installing kitchen cabinet crown molding requires precision and attention to detail. By carefully following these essential aspects, you can create a stunning and sophisticated addition that will enhance the ambiance and value of your kitchen.

How To Install Crown Molding On Cabinets Young House Love

How To Install Crown Molding On Your Cabinets Construction Repair Wonderhowto

How To Install Kitchen Cabinet Crown Molding Family Handyman

How To Attach Crown Mouldings Frameless Cabinets Stonehaven Life

Crown Installation On Kitchen Cabinets Issue Moulding Molding Cabinet

How To Attach Crown Mouldings Frameless Cabinets Stonehaven Life

How To Add Crown Molding Kitchen Cabinets Abby Organizes

10 Steps To Install Crown Molding On Cabinets Fine Homebuilding

Install Kitchen Cabinet Crown Moulding Lowe S

Cabinet Crown Molding Rogue Engineer