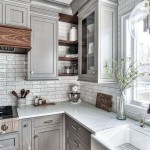
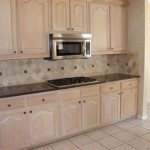
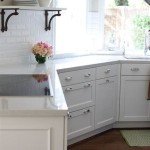
Tiling Around Kitchen Cabinets: A Comprehensive Guide
Transforming your kitchen's aesthetic appeal is as easy as tiling around your cabinets. This project, while involving some technicality, can be tackled with proper planning and attention to detail. Here's a comprehensive guide to help you achieve a flawless tiled finish around your kitchen cabinetry.
1. Prepare the Surface
Ensure a smooth and level surface by removing any existing tile or backsplash. Carefully scrape off any adhesive residue. Sand or grind down any uneven areas, such as protruding drywall or cabinet edges. Clean the surface thoroughly with a degreasing agent to eliminate any oils or dirt.
2. Layout the Tiles
Plan the tile layout to minimize cuts and ensure a balanced appearance. Use a pencil or chalk line to mark the starting point and outline the tile pattern. Consider the spacing between tiles and the width of any grout lines. Remember to incorporate expansion gaps for movement.
3. Apply Adhesive
Spread the appropriate tile adhesive evenly over a small section of the surface, using a notched trowel. Press the tiles firmly into the adhesive, ensuring they are level and aligned with the layout. Use spacers to maintain consistent grout lines. Work in small sections to allow the adhesive to set.
4. Cut Tiles
Use a wet saw or tile cutter to make precise cuts for tiles that need to fit around cabinets or other obstacles. Practice on scrap tiles first to ensure accuracy. Measure carefully and mark the tiles before cutting to reduce waste.
5. Install Around Cabinets
For tiles around cabinets, make relief cuts using a diamond blade to accommodate cabinet frames. Back-notch the tiles for a snug fit against the cabinet. Apply adhesive to the cabinet frames and press the tiles firmly in place. Use a spacer to ensure a consistent gap.
6. Grout and Seal
After the adhesive cures, apply grout to the joints between the tiles. Use a grout float to force the grout into the gaps and smooth the surface. Let the grout dry completely before wiping away any excess with a damp sponge. Seal the grout and tiles with an appropriate sealer to protect the installation from moisture and stains.
7. Finishing Touches
Once the sealer is dry, remove any spacers and clean the surface to remove any residual grout or adhesive. Caulk around the edges of the tiles where they meet the cabinets to create a seamless transition and prevent moisture intrusion.
Conclusion
Tiling around kitchen cabinets requires precision and attention to detail, but it's a rewarding project that can dramatically enhance your kitchen's aesthetics. By following these steps carefully, you can create a professional-looking tiled backsplash that will last for years to come.

Should You Install Tile Floor Before Or After Cabinets

Can You Replace Kitchen Flooring Without Removing Cabinets

Should You Install Tile Floor Before Or After Cabinets

Do I Need Trim Tile Under The Cabinets

How To Tile Oak Kitchens Solid Wood Kitchen Cabinets Information Guides

How To Run Kitchen Cabinets Across A Low Window The Leslie Style

Should You Install Tile Floor Before Or After Cabinets

Do You Tile Under Kitchen Cabinets Seer

Should You Tile Under Kitchen Units Saffron Interiors

How To Replace Kitchen Tiles Without Removing Cabinets Hunker
Related Posts