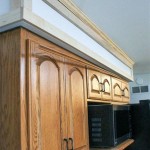
How to Sand Stained Kitchen Cabinets for a Refreshed Look
Stained kitchen cabinets can add a touch of warmth and charm to your kitchen. However, over time, the finish can become dull or damaged, making your cabinets look tired and outdated. Sanding is an effective way to restore the original finish of your cabinets or to prepare them for a new coat of paint or stain. Here's a step-by-step guide on how to sand stained kitchen cabinets:
Step 1: Gather Your Materials
You will need the following materials:
- Orbital sander or sanding block
- Sandpaper in various grits (120, 150, 180, 220)
- Dust mask
- Safety glasses
- Wood filler (optional)
- Tack cloth
Step 2: Prepare the Kitchen
Before you start sanding, it's important to prepare your kitchen. Remove all of the cabinet doors and drawers. Place a drop cloth on the floor around the cabinets to protect it from dust. Wear a dust mask and safety glasses to protect yourself from inhaling dust and debris.
Step 3: Sand the Cabinets
Start by sanding the cabinets with 120-grit sandpaper. This will remove the top layer of the finish and create a smooth surface. Work in small sections, sanding with the grain of the wood. Once you have sanded the entire cabinet with 120-grit sandpaper, switch to 150-grit sandpaper and sand again. Repeat this process with 180-grit and 220-grit sandpaper.
Step 4: Fill in Any Holes or Dents
If your cabinets have any holes or dents, you can fill them in with wood filler. Apply the wood filler with a putty knife and let it dry according to the manufacturer's instructions. Once the wood filler is dry, sand it smooth.
Step 5: Clean the Cabinets
Before you apply a new finish to your cabinets, it's important to clean them thoroughly. Wipe down the cabinets with a tack cloth to remove any dust or debris. You can also use a mild cleaning solution to clean the cabinets.
Step 6: Apply a New Finish
Once the cabinets are clean, you can apply a new finish. You can choose to paint, stain, or refinish the cabinets. Follow the manufacturer's instructions for the specific finish you are using.
Tips
- Use a light touch when sanding. Sanding too hard can damage the wood.
- Change the sandpaper often. A dull sandpaper will not sand effectively.
- Sand in the direction of the wood grain. Sanding against the grain can create scratches.
- Wear a dust mask and safety glasses to protect yourself from inhaling dust and debris.
- Allow the wood filler to dry completely before sanding it.
- Clean the cabinets thoroughly before applying a new finish.

How I Updated My Oak Cabinets Without Paint By Using Briwax Easy Budget Kitchen Makeover Only 24

How To Sand Kitchen Cabinets And Prepare Them For Paint Or Stain Part 3

Staining Your Wood Cabinets Darker Young House Love

How To Make Rustic Kitchen Cabinets By Refinishing Them The Best Stain Color Amanda Katherine

How To Stain Unfinished Cabinets Painting By The Penny
/102182203-4cf08265c33b4c4e88fb21315a8fe626.jpg?strip=all)
Our Step By Guide To Beautiful Stained Wood Cabinets

How To Stain Unfinished Cabinets Painting By The Penny

How To Refinish Kitchen Cabinets Without Stripping

How To Gel Stain Cabinets With Ease Diva Of Diy

Refinish Kitchen Cabinets Without Stripping
Related Posts


