How to Resurface Kitchen Cabinets DIY: A Step-by-Step Guide
Resurfacing kitchen cabinets is a rewarding DIY project that can transform the look and feel of your kitchen. It involves replacing the old cabinet doors and drawer fronts with new ones, while keeping the existing cabinet boxes. Here's a comprehensive guide to guide you through the process: ### Step 1: Gather Materials and Tools - New cabinet doors and drawer fronts - New cabinet hardware (handles and knobs) - Sandpaper (80-, 120-, and 220-grit) - Wood filler - Primer - Paint or stain - Brush or roller - Screws - Screwdriver or drill ### Step 2: Remove Old Doors and Fronts - Open the cabinet doors and unscrew the hinges. - Remove the drawers by pulling them straight out. - Use a screwdriver or drill to remove the old cabinet doors and drawer fronts. ### Step 3: Prepare the Cabinet Boxes - Sand the cabinet boxes lightly with 80-grit sandpaper to remove any old finish or imperfections. - Fill any holes or gaps with wood filler and allow it to dry. - Sand the cabinet boxes again with 120-grit sandpaper to smooth the surface. ### Step 4: Prime the Cabinet Boxes - Apply a coat of primer to the cabinet boxes using a brush or roller. - Allow the primer to dry completely according to the manufacturer's instructions. ### Step 5: Install New Doors and Fronts - Position the new cabinet doors and drawer fronts on the cabinet boxes. - Secure the doors and fronts using screws and a screwdriver or drill. - Adjust the hinges and drawer slides as needed to ensure proper alignment and operation. ### Step 6: Finish the Cabinet Doors and Fronts - Sand the new doors and fronts with 220-grit sandpaper to smooth the surface. - Apply a second coat of primer and allow it to dry. - Apply two coats of paint or stain in your desired color and finish. Allow each coat to dry completely before applying the next. ### Step 7: Install Cabinet Hardware - Install new cabinet hardware by screwing on the handles or knobs. - Position the hardware evenly and securely. ### Tips for Success - Choose high-quality cabinet doors and drawer fronts that match the existing cabinet boxes. - Use a fine-grit sandpaper to avoid scratching the surfaces. - Allow ample drying time between each step to ensure proper adhesion and durability. - Test the fit of the new cabinet doors and fronts before securing them to the cabinet boxes. - Add decorative elements such as molding or trim to enhance the look of the resurfaced cabinets. By following these steps and tips, you can successfully resurface your kitchen cabinets and create a fresh, updated look for your kitchen.
Diy Cabinet Refacing Budget Friendly Made Easy Wisewood

How To Reface Kitchen Cabinets Affordable Cabinet Update On A Budget Anika S Diy Life

Painted Furniture Ideas Diy Refacing Kitchen Cabinets

Kitchen Cabinet Refacing The Happy Housewife Home Management

Cabinet Refacing Ideas Diy Projects Craft How To S For Home Decor With

How To Reface Your Kitchen Cabinets Diy Family Handyman

Diy Cabinet Refacing Budget Friendly Made Easy Wisewood

Cabinet Refacing Ideas Diy Projects Craft How To S For Home Decor With Kitchen Remodel Small Remodeling Cabinets

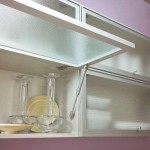
Diy Kitchen Cabinets Makeover How To Install New Cabinet Glass Inserts

Cabinet Refacing How To Make Shaker Doors Love Remodeled

