How to Replace Veneer on Kitchen Cabinets
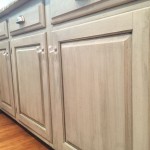
Replacing veneer on kitchen cabinets can give them a fresh, updated look. Veneer is a thin layer of wood that is glued to the surface of a cabinet door or drawer front. It is available in a variety of colors and finishes, so you can choose a look that complements your kitchen décor.
Replacing veneer is a relatively easy project that can be completed in a few hours. However, it is important to follow the proper steps to ensure that the veneer adheres properly and looks its best.
Materials You'll Need
- New veneer
- Contact cement
- Razor blade or utility knife
- J-roller or wallpaper seam roller
- Sandpaper
- Tack cloth
Step-by-Step Instructions
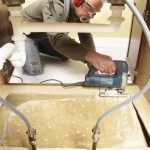
1. Remove the old veneer. Use a razor blade or utility knife to carefully score the old veneer around the edges of the cabinet door or drawer front. Then, use a putty knife to pry the old veneer off.
2. Clean the surface. Use a tack cloth to remove any dust or debris from the surface of the cabinet door or drawer front. This will help the new veneer to adhere properly.
3. Apply contact cement. Apply a thin, even layer of contact cement to the surface of the cabinet door or drawer front. Allow the contact cement to dry for a few minutes until it becomes tacky.
4. Apply the new veneer. Carefully align the new veneer with the cabinet door or drawer front and press it into place. Use a j-roller or wallpaper seam roller to apply pressure and ensure that the veneer adheres properly.
5. Trim the veneer. Use a razor blade or utility knife to trim the excess veneer around the edges of the cabinet door or drawer front.
6. Sand the veneer. Use sandpaper to lightly sand the veneer. This will help to smooth out any rough edges and create a more finished look.
7. Apply a finish. Apply a clear finish to the veneer to protect it and give it a shiny appearance. Allow the finish to dry completely before using the cabinet doors or drawer fronts.
Tips for Replacing Veneer
- Use a sharp razor blade or utility knife to ensure a clean cut when removing the old veneer.
- Apply contact cement evenly and allow it to dry for the recommended amount of time before applying the new veneer.
- Use a j-roller or wallpaper seam roller to apply pressure and ensure that the veneer adheres properly.
- Trim the excess veneer carefully to avoid creating any gaps.
- Sand the veneer lightly to smooth out any rough edges.
- Apply a clear finish to the veneer to protect it and give it a shiny appearance.
Conclusion
Replacing veneer on kitchen cabinets is a relatively easy project that can give them a fresh, updated look. By following the steps in this guide, you can ensure that the veneer adheres properly and looks its best.

Diy Cabinet Refacing Budget Friendly Made Easy Wisewood

How To Reface Kitchen Cabinets With Veneer

Refinishing Kitchen Cabinets Modern Refacing Made Easy Wisewood

How To Use Wood Veneer Reface Kitchen Cabinets Give Them A Whole New Look Time On Our Hands

Diy Cabinet Refacing Budget Friendly Made Easy Wisewood

Veneer Repair And Touch Up On Oak Kitchen Cabinets Timeless Arts Refinishing

Refinishing Kitchen Cabinets Modern Refacing Made Easy Wisewood

How To Repair Warped Cabinet Veneer Ifixit Guide

How To Upgrade Refurbish Your Kitchen Cupboard Doors Removing Veneer From Cabinet

How To Repair Warped Cabinet Veneer Ifixit Guide
Related Posts