Essential Aspects of Cutting Kitchen Cabinet Crown Moulding
Crown moulding adds an elegant touch to kitchen cabinets, creating a sophisticated and finished look. Cutting the crown moulding accurately is crucial to ensure a seamless fit and a professional-looking result. Here's a comprehensive guide on how to cut kitchen cabinet crown moulding with precision:
1. Gather the Necessary Tools
Before you begin, gather the following tools: a miter saw, a protractor or miter gauge, a measuring tape, a pencil or marking tool, a nail gun or brad nailer, and finishing nails.
2. Measure and Mark the Crown Moulding
Measure the length of the cabinet opening where the crown moulding will be installed. Transfer the measurement to the crown moulding and mark it with a pencil. Use a protractor or miter gauge to determine the angles for the miter cuts. Typically, crown moulding requires a 45-degree miter cut.
3. Set Up the Miter Saw
Set up the miter saw according to the angle you determined in step 2. Ensure that the saw blade is sharp and the saw is securely fastened to a stable work surface.
4. Make the Miter Cuts
Align the crown moulding on the miter saw, ensuring that the face of the moulding is facing up. Hold the moulding firmly and make the first 45-degree miter cut. Repeat the process for the other end of the moulding.
5. Dry Fit the Crown Moulding
Place the two pieces of crown moulding together in a dry fit to check the fit. The miter joints should align perfectly and form a 90-degree angle. If necessary, adjust the miter cuts slightly until the fit is perfect.
6. Attach the Crown Moulding
Apply a thin bead of wood glue to the miter joints and press them together firmly. Reinforce the joints with finishing nails driven in at an angle through the face of the moulding into the cabinet face frame.
7. Fill and Finish
Fill any gaps or nail holes with wood filler and allow it to dry. Sand the filled areas smooth and apply paint or stain to match the rest of the kitchen cabinets.
Tips:
- Always use a sharp saw blade to ensure clean cuts.
- Double-check the measurements and angle cuts before making any cuts.
- Practice cutting on scrap pieces of crown moulding to get the hang of it.
- If the miter cuts don't fit perfectly, adjust them slightly by sanding or using a coping saw.
- Be patient and take your time to ensure accurate cuts and a professional-looking finish.

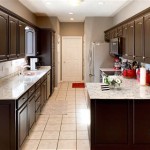
How To Install Crown Molding On Cabinets Young House Love

Diy Kitchen Cabinet Upgrade With Paint And Crown Molding

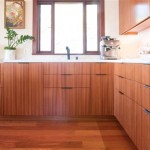
Installing Kitchen Cabinet Crown Molding

How To Cut Crown Molding For Cabinets 12 Steps With S

How To Cut Crown Molding For Cabinets 12 Steps With S

Diy Kitchen Cabinet Upgrade With Paint And Crown Molding

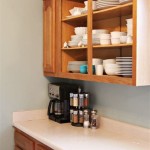
Adding Height To The Kitchen Cabinets Tempting Thyme

Adding Crown Moulding To Wall Kitchen Cabinets Momplex Vanilla Ana White

How To Install Crown Molding On Cabinets Young House Love

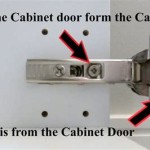
How To Miter Crown Molding At Any Angle The Kim Six Fix
Related Posts