Finishing Kitchen Cabinets: Achieving Professional Results
Finishing kitchen cabinets is a key step in creating a cohesive and aesthetically pleasing kitchen design. Proper finishing techniques enhance the cabinets' durability, protect them from wear and tear, and give them a polished and professional look. Here are the essential aspects of finishing kitchen cabinets for exceptional results:
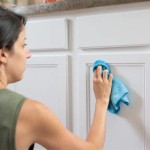
Surface Preparation
Surface preparation is crucial to ensure a smooth and even finish. First, thoroughly clean the cabinets to remove any dirt or grease. Next, sand the surface lightly with fine-grit sandpaper to create a slightly rough texture that will help the paint or stain adhere better. Pay attention to corners and edges.
Priming
Applying a primer before painting or staining is highly recommended. A primer helps seal the surface, reducing the likelihood of stains or tannins bleeding through the finish. It also provides a uniform base for the paint or stain, resulting in a more professional and even appearance.
Painting or Staining
Choosing the right paint or stain is essential to achieve the desired look and durability. For a durable finish, opt for high-quality cabinet paint or stain specifically designed for kitchen surfaces. Apply multiple thin coats, allowing ample drying time between each coat. Use a brush or roller for smooth, even application.
Clear Coating
After painting or staining, apply a clear coat to protect the finish and enhance its longevity. Clear coats come in various sheens, from matte to high-gloss. Choose a sheen that complements the kitchen style and desired effect. Apply the clear coat evenly, allowing proper drying time before handling the cabinets.
Drying and Curing
Proper drying and curing time is essential for the finish to fully adhere and achieve its maximum durability. Allow the cabinets to dry thoroughly in a well-ventilated area. Follow the manufacturer's instructions for the specific paint or stain used and allow ample curing time before exposing the cabinets to regular use.
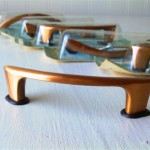
Hardware Installation
Once the finish is fully cured, install the cabinet hardware. Choose hardware that completes the overall design aesthetic and ensures functionality. Consider the placement of pulls, knobs, and hinges for ease of use and a cohesive look.
Additional Tips
* For a seamless finish, remove the cabinet doors and drawers before finishing. * Use a tack cloth to remove any residual dust before each step. * If painting, consider using a spray gun for a smooth and even finish. * Allow extra drying time before handling or cleaning the cabinets to prevent smudging or damage. * Touch up any imperfections after the finish has fully cured, if necessary.
The Most Durable Kitchen Cabinets And Cabinet Finishes

Kitchen Cabinet Finishes For Your Home Designcafe

8 Best Cabinet Finishes Paints Stains Glazes And More Vevano

8 Tips For A Professional Looking Finish On Your Cabinets Cabinetdoors Com

How To Choose The Best Kitchen Cabinet Finish

Kitchen Cabinet Finishes Cabinets Of The Desert

7 Types Of Kitchen Cabinet Finishes Kings

Basics Benefits And Drawbacks Of Matte Cabinet Finishes Awa Kitchen Cabinets

Kitchen Cabinet Finishes For Your Home Designcafe

How To Refinish Cabinets Like A Pro
Related Posts