DIY Vintage Kitchen Cabinets: A Guide to Breathing New Life into Your Kitchen
Vintage kitchen cabinets exude an undeniable charm, adding character and warmth to any culinary space. If you're looking to rejuvenate your kitchen with a touch of nostalgia, undertaking a DIY vintage cabinet project can be an incredibly rewarding endeavor. This comprehensive guide will provide you with essential tips and techniques to help you achieve stunning results.
1. Choosing the Right Cabinets
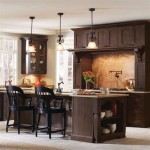
The first step in creating DIY vintage kitchen cabinets is selecting suitable candidates. Antique and architectural salvage stores are ideal sources for finding pre-loved cabinets with unique designs and materials. Look for pieces that complement your kitchen's style and have solid frames and doors.
2. Cleaning and Restoring
Once you've chosen your cabinets, it's time to restore them to their former glory. Remove all hardware and give the surfaces a thorough cleaning. Use a degreaser to remove any grease or grime, then sand down any imperfections or rough spots. If there is significant damage, consider using wood filler to repair it.
3. Painting or Staining
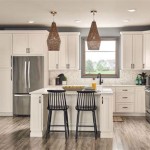
Painting or staining your cabinets will transform their appearance and protect them from wear and tear. Choose a color or finish that blends with your kitchen's décor. If you're painting, use a primer to ensure the paint adheres properly. Apply multiple coats of paint or stain, allowing ample time for drying between each layer.
4. Replacing Hardware
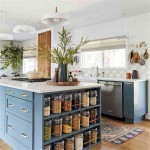
Vintage-style hardware is crucial for completing the look of your cabinets. Replace outdated hardware with new knobs, handles, or drawer pulls that complement the cabinet's design. Experiment with different styles and finishes to find the perfect match for your kitchen.
5. Distressing and Aging
To enhance the vintage charm of your cabinets, consider distressing or aging them. This technique gives them a weathered and timeworn appearance. You can use sandpaper, steel wool, or vinegar to create a distressed finish. Alternatively, apply a dark glaze to the cabinets and wipe it off to achieve an aged effect.
6. Adding Details
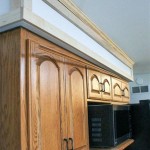
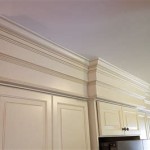
Don't forget the finishing touches that will add depth and character to your vintage kitchen cabinets. Consider installing glass doors or decorative molding to give them a more elaborate appearance. Add lighting under or inside the cabinets for additional functionality and ambiance.
7. Protective Finish
Once you're satisfied with the finished look of your cabinets, it's essential to protect them with a clear finish. Apply a polyurethane or wax coating to seal the surface and prevent wear. This will prolong the life of your DIY vintage kitchen cabinets and keep them looking their best.
By following these steps, you can create stunning DIY vintage kitchen cabinets that will transform your culinary space into a cozy and inviting haven. Embrace the charm of yesteryear and enjoy the satisfaction of breathing new life into your kitchen.:strip_icc()/CTH636097-676a69079ac44957a94399dbce28eb8b.jpg?strip=all)
18 Vintage Kitchen Ideas That Radiate Timeless Style

Here Have Some More Kitchen Inspiration Repurposed Antique Cabinets Victoria Elizabeth Barnes
:strip_icc()/102155453-88c7ab87137e41ef95e2b3bd6ef3d674.jpg?strip=all)
18 Vintage Kitchen Ideas That Radiate Timeless Style

How To Decorate Above Kitchen Cabinets Modern Farmhouse

How To Build Your Own Vintage Style Cabinets Daniel Kanter
:strip_icc()/102283214-59d8a38b2958434f8dd0e5d90c80b942.jpg?strip=all)
18 Vintage Kitchen Ideas That Radiate Timeless Style
:strip_icc()/101660508-85acdbf4c4b1445a907e44a3890615ed.jpg?strip=all)
18 Vintage Kitchen Ideas That Radiate Timeless Style

Vintage Kitchen Makeover Painting Cabinets Hardware Moody French Part One
:strip_icc()/102313139-8630f532c3a04f56916e4aa52d3fb2e5.jpg?strip=all)
18 Vintage Kitchen Ideas That Radiate Timeless Style

Vintage Farmhouse Kitchen Reveal
Related Posts

