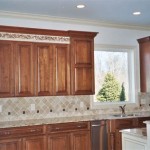
DIY Kitchen Cabinet Molding Installation: A Step-by-Step Guide
Upgrading your kitchen cabinets with molding can transform their look and feel, adding a touch of elegance and sophistication. While hiring a professional carpenter is always an option, it's also a rewarding and cost-effective project that you can tackle yourself with a bit of planning and some DIY skills.
Materials You'll Need:
- Cabinet molding (choose a style that complements your cabinets and kitchen decor)
- Miter saw or miter box
- Wood glue
- Brad nailer and brad nails
- Caulk
- Measuring tape and pencil
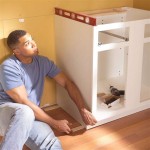
Step 1: Measuring and Cutting the Molding
Start by measuring the length of each cabinet side where you want to install the molding. Use your miter saw or miter box to cut the molding to the desired length, ensuring precise 45-degree angles for a clean fit.
Step 2: Applying Wood Glue
Apply a thin layer of wood glue to the back of the molding. This will help secure it to the cabinet.
Step 3: Nailing the Molding
Position the molding against the cabinet side, aligning it with the top or bottom edge. Use your brad nailer to drive nails through the molding and into the cabinet. Space the nails about 6-8 inches apart.
Step 4: Installing the Corners
For outside corners, miter-cut the molding at 45-degree angles and join them together. For inside corners, cut both pieces of molding at 90 degrees and join them with a miter clamp. Secure the corners with glue and nails.
Step 5: Finishing Touches
Once the molding is installed, apply a small amount of caulk along the edges to fill in any gaps and create a seamless finish. Wipe away excess caulk with a damp cloth.
Tips for Success:
- Use a sharp saw blade to ensure clean cuts.
- Double-check your measurements before cutting the molding.
- Clamp the molding in place while nailing it to prevent movement.
- Don't over-tighten the brad nails, as they can split the molding.
- Apply caulk sparingly to avoid a messy finish.

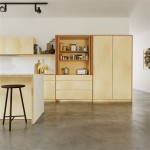
Diy Kitchen Cabinet Upgrade With Paint And Crown Molding

Adding Moldings To Your Kitchen Cabinets Remodelando La Casa

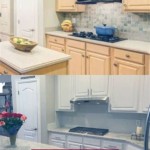
From Drab To Fab Adding Trim Cabinets

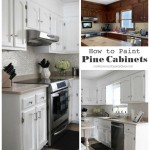
How To Add Trim And Paint Your Laminate Cabinets

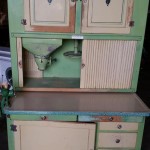
Adding Molding To Old Cabinets Diy Tutorial Kitchen Cabinet Doors

Adding Crown Molding To Kitchen Cabinets Young House Love

From Drab To Fab Adding Trim Cabinets

Painting Kitchen Cabinets And Diy Cabinet Molding Midcounty Journal

Diy Kitchen Cabinet Upgrade With Paint And Crown Molding

Diy Cabinet End Panels With Shaker Style Trim Average But Inspired
Related Posts