## Essential Aspects of DIY Kitchen Cabinet Painting Kitchen cabinets are a significant focal point in any kitchen, and repainting them is an excellent way to update the space and give it a fresh look. While DIY kitchen cabinet painting may seem like a daunting task, it's entirely feasible with the right preparation and techniques. This comprehensive guide will provide you with all the essential information you need to achieve a professional-looking finish.
1. Preparation: Key to Success
Thorough preparation is crucial for a successful paint job. Start by removing all hardware, such as knobs, handles, and hinges. Then, clean the cabinets meticulously with a degreaser or TSP solution to remove any dirt, grease, or grime. Next, lightly sand the surfaces using fine-grit sandpaper to create a smooth and adhesive surface for the paint.
2. Choosing the Right Paint
Selecting the appropriate paint is essential for durability and aesthetics. For kitchen cabinets, oil-based paints are generally preferred due to their excellent resistance to wear, chipping, and moisture. Alternatively, water-based acrylic paints are also an option, offering ease of application and cleanup. Choose a finish that suits your desired look, such as semi-gloss for a clean and modern feel or satin for a more subtle sheen.
3. Priming for Enhanced Adhesion
Priming the cabinets forms a solid base for the paint to adhere to, ensuring a longer-lasting finish. Use a high-quality primer specifically designed for kitchen cabinets. Apply one or two coats, allowing ample drying time between each coat. Once the primer has cured completely, lightly sand the surfaces again to smooth out any brush strokes.
4. Painting with Precision
With the preparation complete, you're ready to paint. Use a high-quality brush or roller designed for cabinetry. Apply thin, even coats, avoiding thick or uneven applications. Start by painting the edges, corners, and difficult-to-reach areas with a brush. Then, use a roller to cover the larger flat surfaces. Allow each coat to dry completely before applying the next.
5. Finishing Touches: Glazing and Polyurethane
To enhance the depth and dimension of your paint job, consider applying a glaze. Glazing involves adding a transparent or semi-transparent colored glaze over the painted surface, enhancing the details and creating a more professional look. Once the glaze is dry, seal the cabinets with a polyurethane finish to protect against wear, scratches, and moisture. Apply two or three thin coats, allowing ample drying time between coats.

How To Paint Kitchen Cabinets In 7 Simple Steps

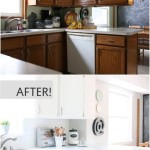
Pa Wedding Photographer Diy Painted Kitchen Cabinets Before After

Diy Painting Your Kitchen Cabinets The Right Way

How To Paint Kitchen Cabinets Without Sanding Sustain My Craft Habit

How To Paint Kitchen Cabinets Budget Friendly Makeover

A Diy Project Painting Kitchen Cabinets

Update On Our Diy White Painted Kitchen Cabinets 2 Years Later

Diy Painted Oak Kitchen Cabinets Makeover

20 Diy Painted Kichen Cabinet Ideas A Cultivated Nest

How To Paint Kitchen Cabinets Diy Makeover

