Distressed Kitchen Cabinets DIY: A Step-by-Step Guide
Distressed kitchen cabinets are a beautiful and unique way to add character to your home. They can create a warm, inviting atmosphere and make your kitchen feel more like a lived-in space. Distressing cabinets is a relatively easy project that can be completed in a few days with the right tools and materials.
In this guide, we will walk you through the steps of how to distress kitchen cabinets DIY. We will cover everything from choosing the right paint and materials to applying the finishing touches.
Step 1: Gather Your Materials
To distress kitchen cabinets, you will need the following materials:
- Sandpaper (120-grit and 220-grit)
- Paint (latex or chalk paint)
- Paint brush or roller
- Tack cloth
- Glaze or antiquing medium
- Wax or polyurethane
Step 2: Prepare the Cabinets
Before you start painting, you need to prepare the cabinets by sanding them down. This will help to create a smooth surface for the paint to adhere to. Start by sanding the cabinets with 120-grit sandpaper. Once you have sanded the cabinets down, wipe them clean with a tack cloth to remove any dust.
Step 3: Paint the Cabinets
Once the cabinets are prepared, you can start painting them. You can use latex or chalk paint for this project. If you are using latex paint, you will need to apply a primer first. Apply two coats of paint, allowing each coat to dry completely before applying the next.
Step 4: Distress the Cabinets
Once the paint is dry, you can start distressing the cabinets. There are several different ways to distress cabinets, but the most common method is to use sandpaper. Start by sanding the edges of the cabinets. Then, sand the corners and any other areas where the paint would naturally wear off. Be careful not to sand too much, as you don't want to remove all of the paint.
Step 5: Glaze or Antiquing Medium
Once you have distressed the cabinets, you can apply a glaze or antiquing medium. This will help to create a more aged look. Apply the glaze or antiquing medium with a brush or rag. Be sure to work it into the crevices and corners of the cabinets.
Step 6: Protect the Cabinets
Once the glaze or antiquing medium is dry, you can protect the cabinets by applying a coat of wax or polyurethane. This will help to seal the cabinets and protect them from wear and tear.
Tips for Distressing Kitchen Cabinets
Here are a few tips for distressing kitchen cabinets:
- Use different grits of sandpaper to create different levels of distress.
- Don't be afraid to experiment with different techniques.
- Take your time and don't rush the process.
- Add personal touches to make the cabinets unique.

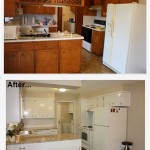
Rescuing And Reviving A Glazed Distressed Kitchen Bella Tucker

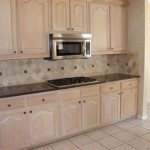
Distressed Kitchen Cabinets How To Distress Your

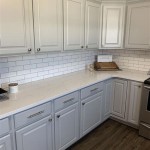
How To Use Distressed Kitchen Cabinets Stylize Your Home

Distressed Kitchen Cabinets S Options Tips Ideas

Rescuing And Reviving A Glazed Distressed Kitchen Bella Tucker

Tired Of Your White Cabinets And Love The French Country Look Watch How She Does This

Black Cabinets With Faux Distressing Used 3 Diffe Colors Of Flat Paint To Create Th Distressed Kitchen Rustic

Rescuing And Reviving A Glazed Distressed Kitchen Bella Tucker

Diy Barn Wood Cabinets The Honeycomb Home

Distressed Kitchen Cabinets In Stock Free
Related Posts