Contact Paper for Kitchen Cabinets: A Comprehensive Guide
Contact paper, a revolutionary solution in home décor, has emerged as a popular choice for upgrading kitchen cabinets without the need for expensive renovations. This self-adhesive paper offers a wide array of options, from classic patterns to sleek solid colors, enabling homeowners to transform their kitchens with ease and affordability. Unlocking the potential of contact paper for kitchen cabinets requires a thorough understanding of its salient features and application techniques.
Choosing the Right Contact Paper
Contact paper comes in a myriad of finishes, textures, and patterns, providing ample choices to match any kitchen style. For a timeless look, opt for marble or granite patterns that mimic the elegance of natural stone. For a modern twist, consider metallic finishes or bold geometric prints. In selecting the perfect contact paper, ensure seamless coordination with existing appliances, countertops, and décor.
Surface Preparation: The Foundation for Success
Flawless application hinges on meticulous surface preparation. Begin by thoroughly cleaning cabinets with a grease-cutting cleaner to remove dirt and grime. Allow ample time for cabinets to dry before proceeding. Next, sand any uneven surfaces or sharp edges to create an optimal adhesive bond. Finally, wipe down the cabinets with a tack cloth to remove any remaining dust or debris, ensuring a smooth and receptive surface.
Application: A Step-by-Step Guide
With preparation complete, embark on the transformative process of applying contact paper to your kitchen cabinets. Unroll the paper and carefully measure and cut the desired pieces to fit each cabinet door and drawer front. Remove the backing paper a few inches at a time, aligning the contact paper with the cabinet edge. Smooth out any air bubbles as you gradually peel off the backing paper and press the contact paper firmly into place. Use a smoothing tool or credit card to eliminate any wrinkles or creases.
Finishing Touches: Enhancing the Transformation
After applying contact paper to all desired surfaces, complete the transformation with finishing touches. Trim any excess paper around the edges using a sharp utility knife. If contact paper overlaps onto adjoining surfaces, gently lift the paper and trim it flush with the edge. For a professional-looking touch, apply a thin bead of clear silicone caulk around the edges to seal the paper and prevent moisture penetration. Allow the caulk to cure before using the cabinets.
Maintenance and Care: Extending the Beauty
Maintaining the pristine condition of your contact paper-covered cabinets is essential for longevity. Regularly clean surfaces with a mild soap-and-water solution, avoiding abrasive cleaners that may damage the paper. Wipe down cabinets with a soft cloth for optimal results. To address minor scratches or tears, use a touch-up marker or paint that matches the contact paper's color.

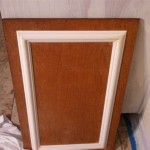
How To Update Cabinets Using Contact Paper Al Kitchen Makeover Cover

Diy Contact Paper Kitchen Counters The Interior Diyer

Contact Paper In The Kitchen 5 Places

How To Update Cabinets With Contact Paper The Handyman S Daughter

Temporary Contact Paper Kitchen Cabinet Decorations Pink Stripey Socks

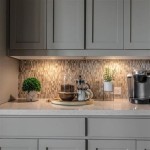
Spruce Up The Outside Of Your Kitchen Cabinets With Contact Paper Offbeat Home Life

The Best Contact Paper For Kitchen Cabinets Hunker

17 Best Contact Paper Cabinets Ideas Wallpaper And Tiles Modern Designs

Re Wrapping Kitchen Cabinets With Contact Paper Er Friendly

Re Wrapping Kitchen Cabinets With Contact Paper Er Friendly
Related Posts