Antiquating Kitchen Cabinets With Chalk Paint: A Comprehensive Guide
Transforming modern kitchen cabinets into charming antiques with the magic of chalk paint is a rewarding experience. Whether you seek to add character to your kitchen or simply enhance its aesthetics, this guide will equip you with the essential aspects of antiquing kitchen cabinets with chalk paint, ensuring a stunning and durable result.
1. Preparation: The Blueprint for Success
Proper preparation is paramount for a successful antiquing endeavor. Begin by thoroughly cleaning your cabinets to remove dirt, grease, and any lingering debris. Next, sand the surfaces lightly with a fine-grit sandpaper to create a smooth base for the paint to adhere to. This step also promotes better paint penetration, resulting in a longer-lasting finish.
2. Choosing the Right Chalk Paint: A Palette of Possibilities
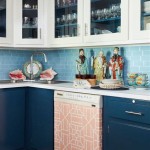
The choice of chalk paint plays a crucial role in achieving the desired antique look. Opt for a high-quality chalk paint specifically designed for kitchen cabinets, as it possesses superior durability and ease of application. Experiment with different brands and colors to find the perfect match for your kitchen's style and décor. Consider using a dark base color for a richer antique effect, followed by lighter layers for distressing.
3. Painting Techniques: Brushstrokes of Elegance
Apply the first coat of chalk paint evenly and allow it to dry completely. For an authentic antique appearance, aim for a slightly uneven finish. Once dry, sand lightly with a fine-grit sandpaper or steel wool to create a distressed effect. Avoid sanding excessively, as it can compromise the paint's integrity.
4. Layer and Glaze: Depth and Dimension
To create depth and dimension, apply additional layers of chalk paint in varying shades. Start with a darker color and gradually transition to lighter tones. Alternatively, glaze the painted surface with a transparent glaze to enhance the depth and protect the paint finish. Experiment with different techniques to achieve the desired level of antiquing.
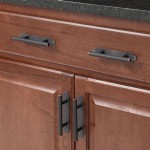
5. Hardware Revival: Completing the Transformation
Don't overlook the hardware when antiquing kitchen cabinets. Replace old or outdated handles and knobs with antique-style hardware that complements the cabinet's finish. Opt for patinaed or distressed hardware for a cohesive look. Alternatively, you can paint or glaze existing hardware to match the cabinet's new antique aesthetic.
6. Sealing and Protecting: Preserving Your Masterpiece
Once you're satisfied with the antiqued finish, protect your hard work with a clear sealer. Choose a sealer specifically designed for chalk paint, as it will enhance the paint's durability and prevent damage. Apply the sealer evenly over the entire surface, paying special attention to areas prone to wear and tear.
Conclusion
Antiquing kitchen cabinets with chalk paint is a satisfying and rewarding project that can transform the heart of your home. By following these essential aspects, you'll achieve a stunning and durable antique finish that will enhance the character and beauty of your kitchen for years to come.

Chalk Painted Kitchen Cabinets 2 Years Later Our Storied Home

Painting Kitchen Cabinets With Chalk Paint The Kelly Homestead

Antiqued Cabinets Home Decor Kitchen Remodel Antique White

Chalk Painted Kitchen Cabinets 2 Years Later Our Storied Home

Maison Decor Kitchen Cabs Get A Grey Chalk Wash Cupboards Paint French Country Kitchens

Painting Cabinets With Chalk Paint Is So Easy Leap Of Faith Crafting

Rescuing And Reviving A Glazed Distressed Kitchen Bella Tucker

Transform Your Kitchen Cabinets With Annie Sloan Chalk Paint

Why I Repainted My Chalk Painted Cabinets Sincerely Sara D Home Decor Diy Projects

Distressed Kitchen Cabinets How To Distress Your Our Fifth House
Related Posts