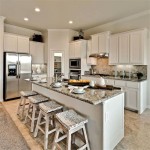
Transform Your Kitchen with DIY Chalk Paint: A Comprehensive Guide
Elevate the aesthetic appeal of your kitchen with the charm of DIY chalk paint. This versatile painting technique offers a budget-friendly and transformative approach to refreshing your cabinetry without the need for professional assistance. Discover the essential aspects of DIY kitchen cabinets chalk paint for an impeccable finish that will revitalize your kitchen space.
Prepare Your Canvas: Cleaning and Sanding
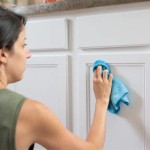
Begin by thoroughly cleaning your kitchen cabinets using a degreasing cleaner. Remove all hardware, such as knobs and handles. Lightly sand the surfaces to create a rough texture that will enhance paint adhesion. Use a fine-grit sandpaper or sanding sponge.
Prime for Perfection: Using a Bonding Primer
Apply a bonding primer to ensure the chalk paint adheres properly to the smooth surface of your cabinets. Choose a primer specifically designed for chalk paint or other decorative finishes. Allow the primer to dry completely before moving on to the paint.
Choosing the Right Chalk Paint: Flat or Matte Finish
Chalk paint is available in flat or matte finishes. Flat paint provides a smooth, velvety look, while matte paint has a slightly more lustrous sheen. Consider the desired aesthetic and the lighting in your kitchen when making your selection.
Apply the Paint: Thin Coats for a Smooth Finish
Use a paintbrush or roller to apply thin, even coats of chalk paint. Avoid overworking the paint, and allow each layer to dry completely before applying the next. Use a light sanding sponge to smooth any imperfections between coats.
Protect Your Masterpiece: Wax or Polyurethane
Protect the painted surface and achieve your desired finish with either wax or polyurethane. Wax provides a soft, natural look, while polyurethane creates a more durable and glossy finish. Apply a thin, even layer and allow it to fully cure before using your cabinets.
Distressing and Aging: Optional but Artistic
For a vintage or distressed look, consider distressing the paint after it has completely dried. Use sandpaper, a rotary tool, or even a wire brush to remove paint in select areas. To enhance the effect, apply a dark glaze or wax into the distressed areas.
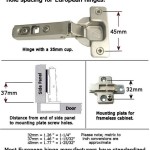
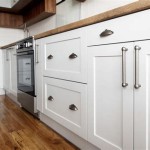
Hardware and Accessories: Finishing Touches
Reattach the hardware to complete the transformation. You can update the knobs and handles to match the new paint color or choose a complementary style. Adding decorative accents, such as stencils or drawer liners, can further enhance the visual appeal of your kitchen cabinets.
With careful preparation, patience, and the right techniques, you can transform your kitchen cabinets with the charm of DIY chalk paint. Embrace the possibilities of this versatile painting technique and create a space that reflects your personal style and adds a touch of charm to your home.

Painting Kitchen Cabinets With Chalk Paint Simply Today Life

Chalk Painted Kitchen Cabinets 2 Years Later Our Storied Home

How To Paint A Kitchen With Chalk Maison De Pax

Chalk Paint Kitchen Cabinets 2 Amazing Before Afters And How To The Interiors Addict

Chalk Painted Kitchen Cabinets 2 Years Later Our Storied Home

Painting Kitchen Cabinets With Chalk Paint Simply Today Life

Why I Repainted My Chalk Painted Cabinets Sincerely Sara D Home Decor Diy Projects

Annie Sloan Chalk Paint Kitchen Cabinets A Créé Une Peintu Painting

Step By Kitchen Cabinet Painting With Annie Sloan Chalk Paint Jeanne Oliver

Kitchen Cabinet Refresh With Chalk Paint By Annie Sloan Stylish Patina
Related Posts