Painting Pine Kitchen Cabinets: A Comprehensive Guide for a Stunning Transformation
Pine kitchen cabinets are a classic choice for their natural beauty and affordability. However, over time, they can become faded, chipped, or outdated. If you're looking to breathe new life into your kitchen without replacing the cabinets, painting them is an excellent option.
Before You Start: Preparation is Key
Proper preparation is crucial for a successful painting project. Begin by thoroughly cleaning the cabinets with a degreaser to remove any dirt, grease, or grime. Next, sand the surfaces lightly with a medium-grit sandpaper to create a smooth base for the paint.
If the cabinets have any hinges or handles, remove them to make painting easier. Be sure to label them so you can put them back in the correct locations later.
Choosing the Right Paint and Tools
For pine cabinets, a high-quality oil-based paint is recommended. It provides excellent coverage, durability, and resistance to moisture and wear. Opt for a semi-gloss finish for a durable and easy-to-clean surface.
As for tools, you'll need a paintbrush, roller, extension pole, and a sanding sponge for touch-ups. Ensure you have clean rags and drop cloths on hand as well.
Applying the First Coat: Brushwork and Rolling
Start by applying the paint to the edges and corners of the cabinets using a paintbrush. This will give you more control and precision in those areas. Once the edges are covered, use a roller to apply the paint evenly over the larger surfaces.
Roll in one direction with smooth, even strokes. Avoid overworking the paint, as this can cause streaks or bubbles. Allow the first coat to dry thoroughly before proceeding to the next one.
Sanding and Applying the Second Coat
Once the first coat has dried, lightly sand the surfaces with a sanding sponge to smooth out any rough spots or unevenness. This will ensure a flawless finish for the second coat.
Apply the second coat following the same technique as for the first coat. This should provide ample coverage and a rich, even color.
Finishing Touches and Post-Painting Care
After the second coat has dried, reattach the hinges and handles. Allow the cabinets to cure for at least 48 hours before using them to ensure the paint has fully hardened.
To maintain the new finish, wipe down the cabinets regularly with a damp cloth. Avoid using harsh chemicals or abrasive cleaners, as these can damage the paint.
Conclusion
With careful preparation and proper techniques, painting pine kitchen cabinets is a rewarding project that can transform the look of your kitchen. By following these steps and using quality materials, you can achieve a stunning and durable finish that will last for years to come.

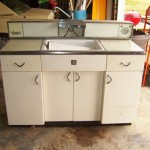
Pine Kitchen Before And After

How To Paint Your Kitchen Cabinets Yourself For A Total Transformation Cabana State Of Mind

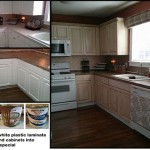
Painted Pine Kitchen Cabinets

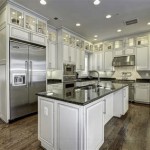
Knotty Pine Kitchen Makeover To Modern Chic Remodel Layout

Pine Kitchen Before And After

Painted Pine Kitchen Cabinets

15 Diy Kitchen Cabinet Makeovers Before After Photos Of Cabinets

Get Inspired For Your Remodel With These 10 Stylish Kitchen Remodels Budget Remodeling Projects Small

Kitchen Renovation Updating Knotty Pine Cabinets Remodelaholic

Painted Cabinets Nashville Tn Before And After Photos
Related Posts