Glazing Honey Oak Kitchen Cabinets: A Guide to Achieving a Timeless and Sophisticated Look
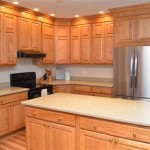
Honey oak kitchen cabinets exude warmth, elegance, and a touch of nostalgia. To enhance their beauty and durability, glazing is a popular technique that involves applying a transparent or semi-transparent layer over the wood's surface. Glazing not only protects the cabinets but also creates a unique visual appeal that complements a wide range of kitchen styles.
In this guide, we will explore the essential aspects of glazing honey oak kitchen cabinets, providing you with the information you need to make informed decisions and achieve a stunning kitchen transformation.
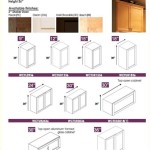
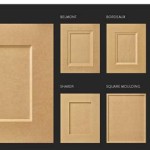
Understanding Glazing Techniques
Glazing involves applying a liquid medium over the wood, allowing it to penetrate the surface and enhance its color and texture. There are two primary glazing techniques:
- Clear Glazing: This technique uses a transparent glaze that subtly enhances the wood's natural color and grain pattern.
- Colored Glazing: This technique employs a glaze with pigments to add a hint of color to the wood. It can be used to create a bolder effect or to match the cabinets with other kitchen elements.
Choosing the Right Glaze
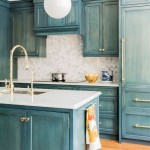
The choice of glaze depends on the desired effect and the existing finish of your cabinets. If you want to preserve the natural beauty of the honey oak, opt for a clear glaze. For a more dramatic look, consider a colored glaze in shades such as amber, gold, or walnut.
When choosing a glaze, it's important to test it on an inconspicuous area of the cabinet to ensure the desired result. Allow the glaze to dry completely before making a final decision.
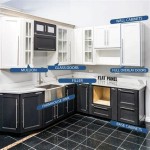
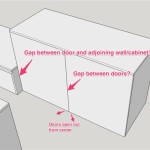
Preparing the Cabinets
Before applying glaze, the cabinets must be thoroughly cleaned and sanded. Remove any dirt, grease, or dust that could interfere with the glazing process. Use fine-grit sandpaper to lightly sand the surface, creating a smooth base for the glaze to adhere to.
Apply a thin coat of primer to help the glaze bond better to the wood. Allow the primer to dry completely before proceeding with the glazing process.
Applying the Glaze
Apply the glaze using a brush, sponge, or cloth. Work in small sections to ensure even coverage. Allow the first coat to dry for the recommended time and then apply additional coats as needed to achieve the desired intensity.
Use a damp cloth to wipe away any excess glaze and smooth out any brush strokes. Allow the glaze to dry completely before moving on to the next step.
Protecting the Glaze
Once the glaze is dry, apply a clear topcoat to protect the finish from scratches, stains, and wear. Choose a topcoat specifically designed for glazed surfaces, as it will provide a durable and long-lasting protective layer.
Allow the topcoat to dry completely and enjoy the stunning transformation of your glazed honey oak kitchen cabinets.

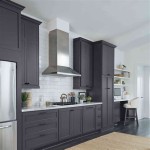
Glazed Oak Cabinets For A Fresh And Modern Look

Bye Honey Oak Kitchen Cabinets O Brighter

How To Glaze Cabinets At Home With The Barkers

How To Glaze Cabinets At Home With The Barkers

Frosted Glass Doors For Oak Cabinets

Honey Oak

Painted Wood Cabinets Vs Stained A Questionnaire Kylie M Interiors

Save Your Kitchen Glazed Oak Or Cerused How To

5 Best Backsplash Styles For Honey Oak Cabinets Marble Systems Supplier Travertine Granite Tile

70 Glazing Oak Cabinets Before After Kitchen Nook Lighting Ideas Check More At Http Www Planetgreenspot Com 50 A Maison Cabinet