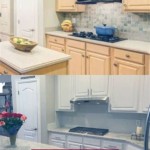
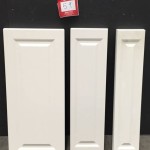
Kitchen Cabinets Crown Molding Installation Guide
Adding crown molding to kitchen cabinets can enhance their appearance and create a visually appealing focal point in the kitchen. The process may seem daunting, but with proper planning and careful execution, it can be a rewarding DIY project. This guide will walk you through the essential steps involved in crown molding installation for kitchen cabinets.
Materials Needed:
- Crown molding
- Miter saw or compound miter saw
- Brad nailer or finishing nails
- Caulk and caulk gun
- Measuring tape
- Pencil
- Hammer or nail gun
Step 1: Measuring and Cutting
Measure the length of the cabinets to determine the amount of crown molding needed. Transfer the measurements to the molding and cut mitered angles at 45 degrees on both ends using a miter saw. Ensure that the miters fit together snugly.
Step 2: Attaching the First Piece
Place the first piece of crown molding along the front edge of the cabinet, aligning it flush with the top and back of the cabinet. Use brad nails or finishing nails to secure the molding to the cabinet, spacing them evenly along the length.
Step 3: Installing the Remaining Pieces
Continue attaching the remaining pieces of crown molding, carefully joining them to the previous ones using the mitered angles. Make sure the miters align perfectly for a seamless appearance. Nail each piece securely using brad nails or finishing nails.
Step 4: Filling Gaps and Finishing
Once the crown molding is installed, check for any gaps or imperfections. Fill any visible gaps with caulk using a caulk gun, smoothing it out with a wet finger or a caulking tool. Allow the caulk to dry and touch up any remaining areas with paint or primer to match the existing cabinetry.
Tips for Success:
- Use a sharp saw blade for clean cuts.
- Practice cutting miters on scrap pieces before working on the actual molding.
- Dry fit the pieces together before nailing them in place.
- Countersink the nails slightly below the surface using a nail set or hammer.
- Allow time for the caulk to dry completely before painting or priming.
By following these instructions, you can successfully install crown molding on your kitchen cabinets, adding elegance and charm to your kitchen décor.

How To Attach Crown Mouldings Frameless Cabinets Stonehaven Life

How To Attach Crown Mouldings Frameless Cabinets Stonehaven Life

Crown Molding Installation Instruction

How To Attach Crown Mouldings Frameless Cabinets Stonehaven Life

Installing Cabinet Crown For Beginners A Simpler Method

Cabinet Crown Molding Rogue Engineer

How To Install Crown Molding On Kitchen Cabinets

Crown Moulding Secure Directly To Cabinet Face Rta Blog

Installing Kitchen Cabinet Crown Molding

Types Of Moldings For Cabinets Com Cabinet Molding Kitchen Crown