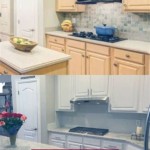
Essential Aspects of Kitchen Cabinet Moulding Installation
To enhance the aesthetic appeal and functionality of your kitchen cabinets, moulding installation is a crucial consideration. Here are some essential aspects to guide you in ensuring a professional and seamless installation:
Pre-Installation Preparation
Before commencing installation, meticulous preparation is paramount. Ensure the cabinet doors and drawers fit snugly and are aligned correctly. Clean the surfaces to remove any dust or debris that may hinder adhesion. Use a pencil to lightly mark the desired moulding placement, which will serve as a guide during installation.
Measuring and Cutting
Precise measurements are vital to achieve a flawless result. Measure the length of the designated areas and cut the moulding accordingly using a miter saw or a miter box. Angle the cuts at 45 degrees to create tight and seamless corners.
Adhesive Selection
Selecting the appropriate adhesive is essential for a secure bond. Opt for a high-quality adhesive specifically designed for moulding installation. Read the manufacturer's instructions carefully to determine the required amount and application method.
Application and Clamping
Apply a thin layer of adhesive to the backside of the moulding and align it with the marked placement. Secure the moulding in place with clamps or finishing nails. Ensure the corners are joined tightly to prevent gaps. Allow the adhesive to set according to the manufacturer's recommendations.
Filling and Refinishing
Once the adhesive has cured, fill any visible gaps or nail holes with a matching wood filler. Allow the filler to dry completely and sand it smooth. If desired, you can apply paint or stain to match the existing cabinet finish, enhancing the seamless integration of the moulding.
Additional Tips for Success
- Use a sharp saw blade to ensure clean cuts and prevent chipping.
- Test the adhesive on a scrap piece of moulding before applying it to the actual surfaces.
- Work in a well-ventilated area to avoid inhaling fumes from the adhesive.
- Allow ample time for the adhesive to cure before using the cabinets.
- Consider consulting with a professional for more complex moulding installations.
By following these essential aspects, you can successfully install kitchen cabinet mouldings that elevate the look and feel of your kitchen space. Remember that meticulous preparation and precision are key to achieving a professional and long-lasting installation.

Adding Crown Molding To Kitchen Cabinets Young House Love

7 Types Of Cabinet Moldings And How To Use Them Properly

Adding Moldings To Your Kitchen Cabinets Remodelando La Casa

10 Types Of Kitchen Cabinet Molding For Your Home

Adding Crown Moulding To Wall Kitchen Cabinets Momplex Vanilla Ana White

Diy Kitchen Cabinet Upgrade With Paint And Crown Molding

How To Add Crown Molding Kitchen Cabinets Abby Organizes

Kitchen Cabinet Crown Molding Reality Daydream

How To Add Trim And Paint Your Laminate Cabinets

How To Add Crown Molding Kitchen Cabinets Abby Organizes
Related Posts


